
Staring wearily at my laptop screen, I tried to comprehend the task at hand. Every corner of my brain was flooding with “to-dos.” I had let the routine maintenance go for too long and now the reality of giving my 8-year-old nutrition blog a facelift felt like an undertaking of staggering proportions. To say I was overwhelmed was an understatement.
But I was months into the pandemic, working from home, and like many people, finding that I needed the distraction and focus of a project to help get through the indistinct passing of hours, days, and weeks. Let me tell you, what started as a tiny idea (“Hey, let’s refresh the blog!”) has been a massive endeavor that took months, and still isn’t really finished. I thought I’d share some of the details of my naive journey as a cautionary tale: don’t put your blog on the back burner for 8 years. Unless you like to feel inadequate, antiquated, and overloaded all at the same time.
After reflecting a bit on my blog’s history (primarily as a procrastination technique to avoid watching a YouTube video about permalinks), it seems the trajectory of its growth is inherently tied to significant life events. I was downsized from my health education job at a local hospital in November of 2011 after 14 years. At the same time, I was freshly home from a professional dietetics conference where one presenter had noted, “Every dietitian should have a blog.” Feeling rudderless and a bit hopeless, I decided to take her advice and start with baby steps: sign up for a WordPress class at the local community college.
The learning curve was steep; I remember that distinctly.
- I figured out the difference between WordPress.com and WordPress.org,
- I picked a free theme for the blog’s design and,
- I started writing posts.
I officially became a blogger in January of 2012. At first, I posted weekly, then monthly for many years, and then that dwindled to every 4 or 5 months, reflecting the fullness of my schedule with other pursuits. For each post, I would share it on Twitter, Facebook, and Pinterest and that was it. No thought was given to search engine optimization, keywords, or decent photography, for that matter. Write, post, repeat was my routine for 8 years.
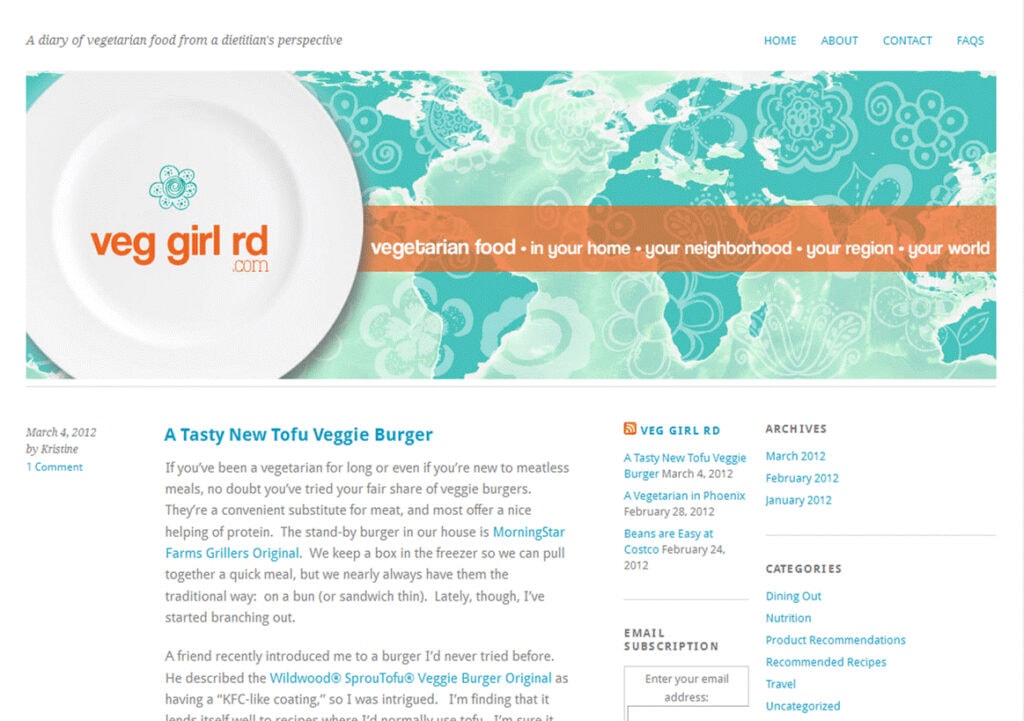
Then, for some reason in September of 2020, I looked at the blog with fresh eyes and realized how outdated it had become. It had been fine for years (right?), and now in a complete about-face, I suddenly felt embarrassed by how ancient it was compared to other blogs. You know the feeling. Like when you look in the mirror and realize your favorite jeans are a little (gasp) matronly? How did this happen? How did I not notice this before? So I started by searching for designers and comparing prices tout suite. And herein begins the list of my steps to a better blog.
1. Find a designer
I went looking for blogs I liked and then found out who built them. I asked for designer referrals from food blogger and dietitian Facebook groups. Then I started reaching out asking for quotes. I ended up working with my designer for 10 weeks, and items 2-7 in the list below were her suggestions. But that wasn’t the end of it.
After she signed off, I continued additional improvement projects on my own, which make up the remainder of the list. It’s sort of like when you decide to replace a ceiling fan, only to discover faulty wiring, which requires a new junction box, which doesn’t fit the original hole, which means a drywall patch and new texture which then needs painting. You pull on one thread and you end up unraveling the whole out-of-style sweater. Blog. Sweater-blog. Whatever.
2. Rewrite “About” page and philosophy
Geez. I wrote this self-aggrandizing stuff in 2012 about why I thought I was starting the blog and never looked at it again. For 104 months. In case you’re wondering, I don’t recommend this approach. After being left alone for so long, my words sounded a little righteous, I was using outdated terminology, I talked about pets and jobs I don’t have anymore, and it just didn’t fit me. And, now having another 8/10 of a decade to blog, teach, and learn, it felt good to update all of it.
3. Choose a font and color scheme for the new design
During this process, I found out I have a font problem: I like fonts. Sort of like how when I reorganized my pantry I found out I was storing 9 different kinds of chocolate chips, which seems like a problem.
And once you start looking, you can’t stop noticing fonts. Everywhere. And then you want to find out what they’re called. And then you want to use them for your new blog. I think I changed my mind at least 5 times until I eventually forced myself to stop. I still see new fonts on other people’s blogs, feel font jealousy, and have an inkling to change mine…again. I ended up with Montserrat and Lora, and I’m happy. For now…
(Turns out I’m not the only one who’s font obsessed. Ryan Gossling is too.)
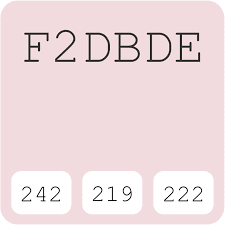
The look of the Choosing Chia blog is one of my favorites, so I had her site in mind when I was choosing a color scheme. I prefer the simplicity of black and white, and then chose pale pink #F2DBDE for an accent.
4. Shoot new pictures of yourself
I’d never really featured myself on the blog. The post pictures were essentially all food and no people. I’d had my husband take some headshots in 2013 and again in 2018, but they were already past their prime. And my designer asked for lifestyle shots, which was a new concept for me.

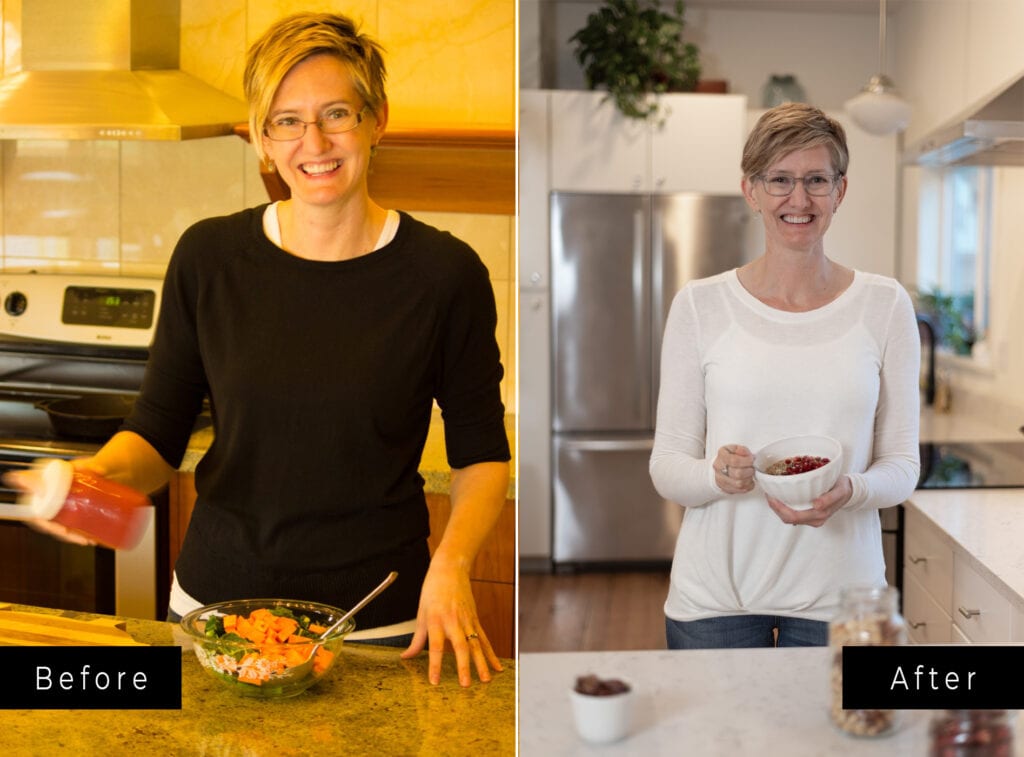
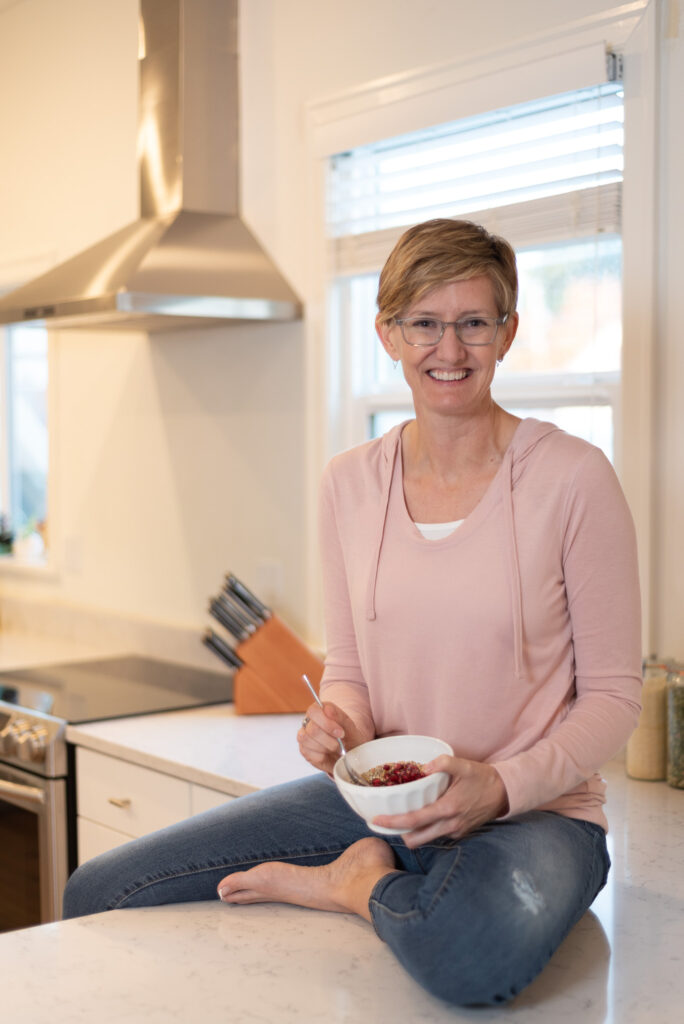
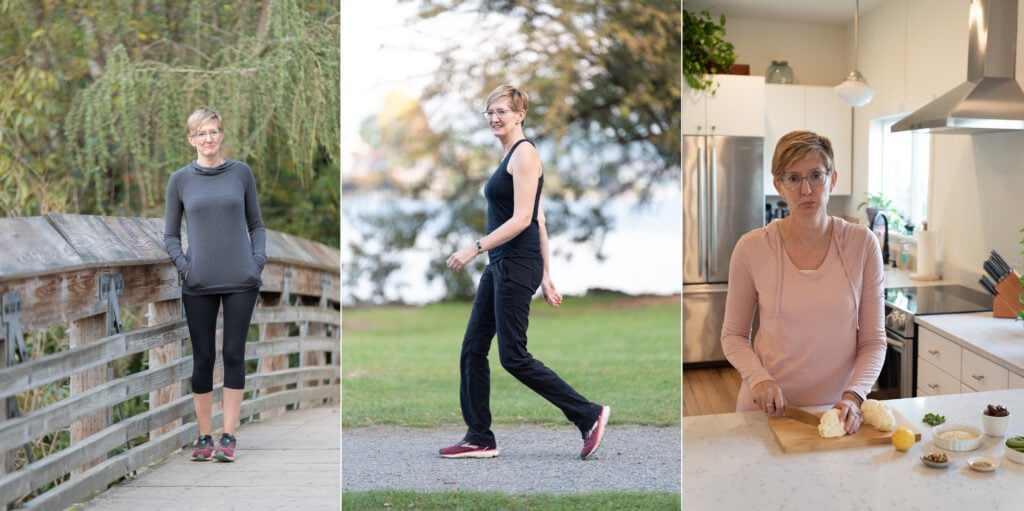
As you can probably imagine, watching dietitians at work is boring. No one wants to look at a picture of me meal planning or figuring out nutrition facts for a new recipe. So I was stumped at first for poses and activities. I asked for ideas from my friends, and ended up jogging, paddle boarding, walking, leaning, and kneeling for the camera. I also found a pretty kitchen that wasn’t mine to shoot some requisite “detail-oriented and highly anxious food blogger smiling casually with food” shots.
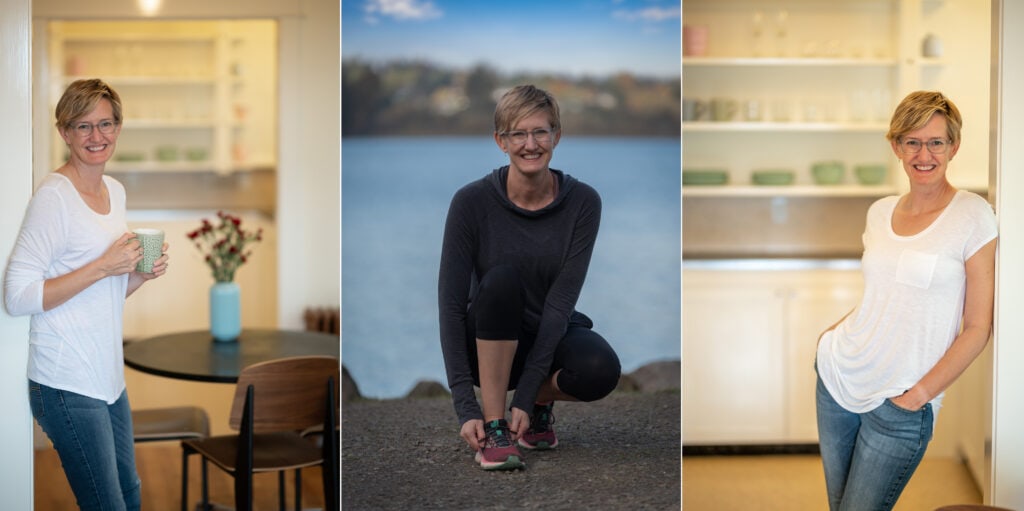
I used Pinterest for pose inspiration, and dressed in white, pale pink, and black to match the blog’s new color scheme. I also fussed about my smile, wrinkles in my clothing, wrinkles on my face, and of course, my hairstyle. After sharing some of the final pics on Facebook and asking folks to vote for their favorites, I was dismayed to find out many people were turned off by seeing my feet on the kitchen counter. Skeeved, even. It was a mix of personal preference (“no feet where we eat”) and cultural meaning (showing the sole of your foot is disrespectful). I had no idea.
And, of course many, many of them didn’t turn out as expected or were a tad unflattering. Here are a few from the blooper reel.
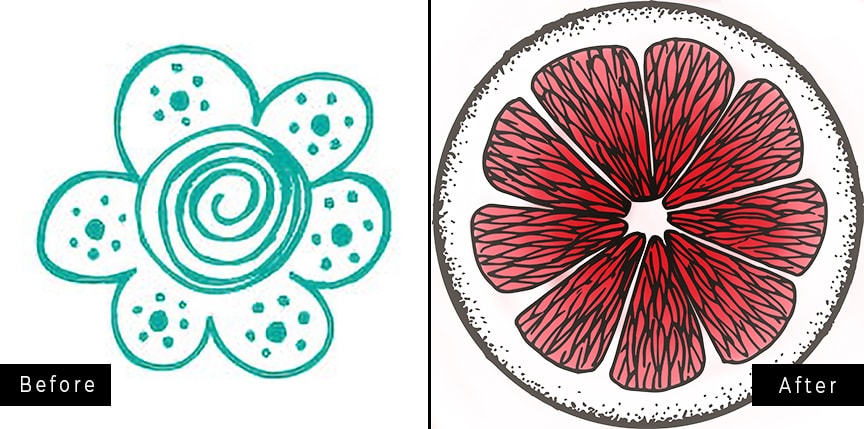
5. Pick a new logo and favicon
My original logo was designed by my graphic designer friend, Kari. And I loved it. 8 years ago and every day since. Regrettably, I realized it too needed an update. My site designer sent some basic logos to choose from; no images this time, just my name and the name of the blog.
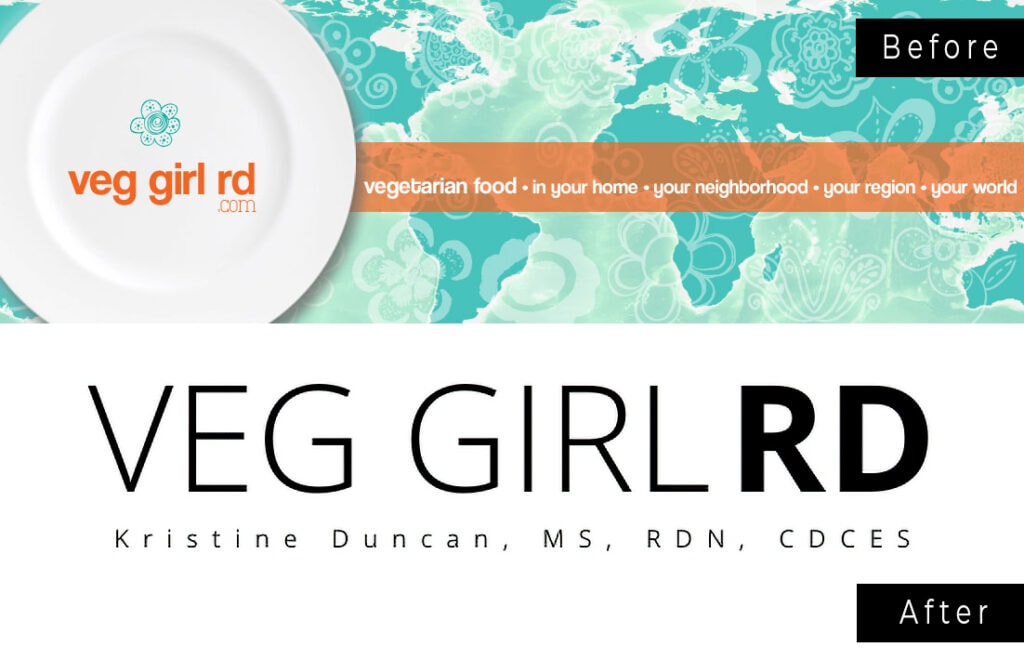
Once I settled on the sleek black and white design, I went looking for a favicon – that cute tiny icon that shows on the tab of an open browser window so you know where to click to get back to Pinterest, Google Search Console, or “Playtime with Harry Styles” on Vogue.com. Drawing from the pink inspiration of the new color scheme and a wish to put the focus on plant foods, I opted for a cute pink grapefruit slice.
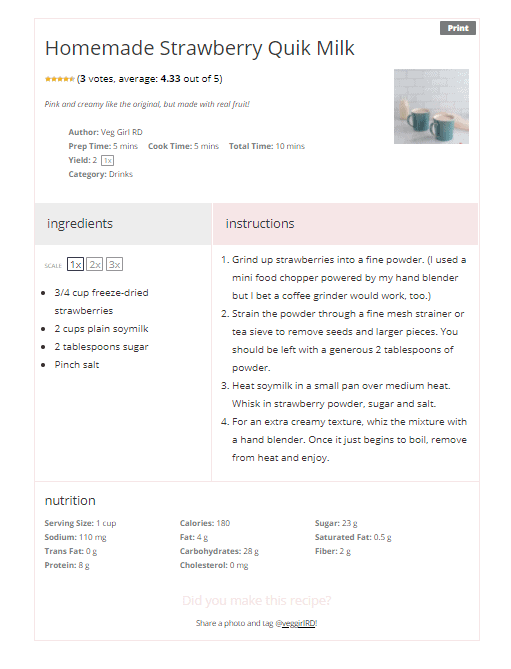
6. Get new recipe plugin and transfer all recipes
This was surprisingly easy! I foresaw hours and hours of tediousness as I transferred every recipe from Easy Recipe Plus to WP Tasty. But it was essentially painless. I couldn’t have been happier and I love the new contemporary layout of the recipe card.
I did remember during this process that I had a handful of old recipes that I’d posted before I even started using Easy Recipe Plus so I did spend a few hours getting those entered in so they’d display correctly.
7. Change categories and tags on all posts
With my designer’s help, I decided on new categories and tags. It was something I never really paid attention to before. Surprise surprise. But it was integral to making the new design work and helping visitors find things more easily on the site. So, it made sense to sit down and really think through it.
I streamlined my original massive list of categories and ended up with a very handy drop-down list for Recipes:
And, another list for Blogs:
Then I had to go into every single post and change categories and tags. 221 posts, folks. Thank goodness my designer told me about the Quick Edit function in WordPress. I’d been using the program for, you know, 8 years, and always opened up each post fully to edit it and waited while it slowly loaded. This magical Quick Edit allows you to make changes from the All Posts screen. Genius!
Here’s where I started my own list of what else needed to be done, spurred by her improvements and seeing the results of the initial overhaul.
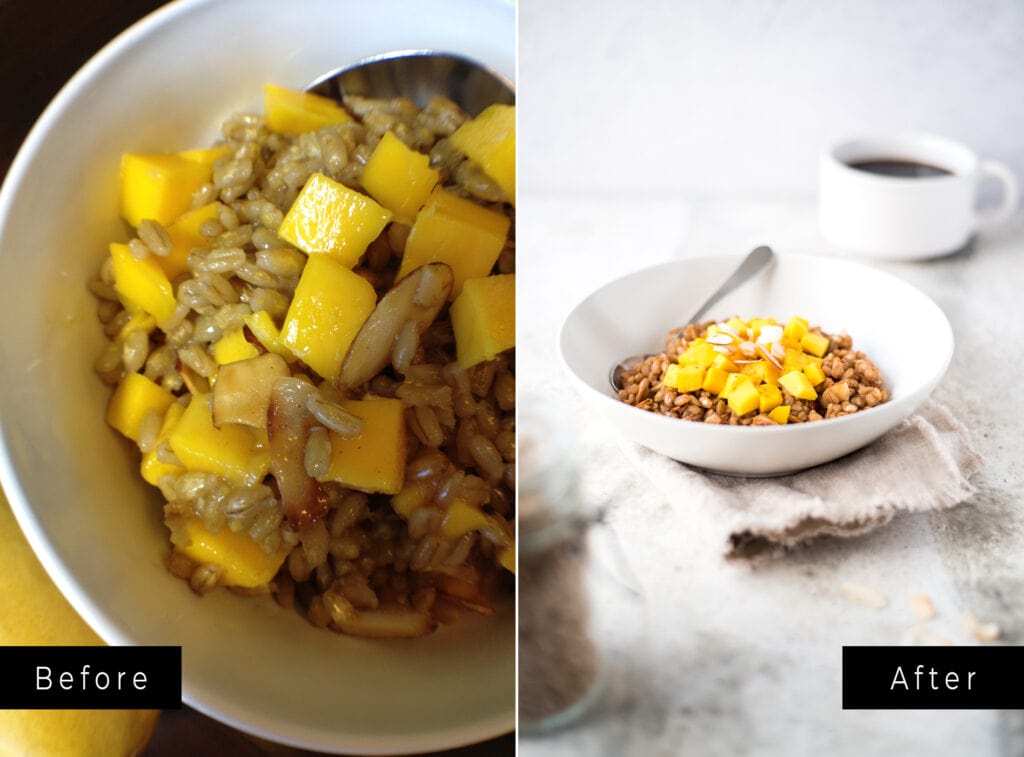
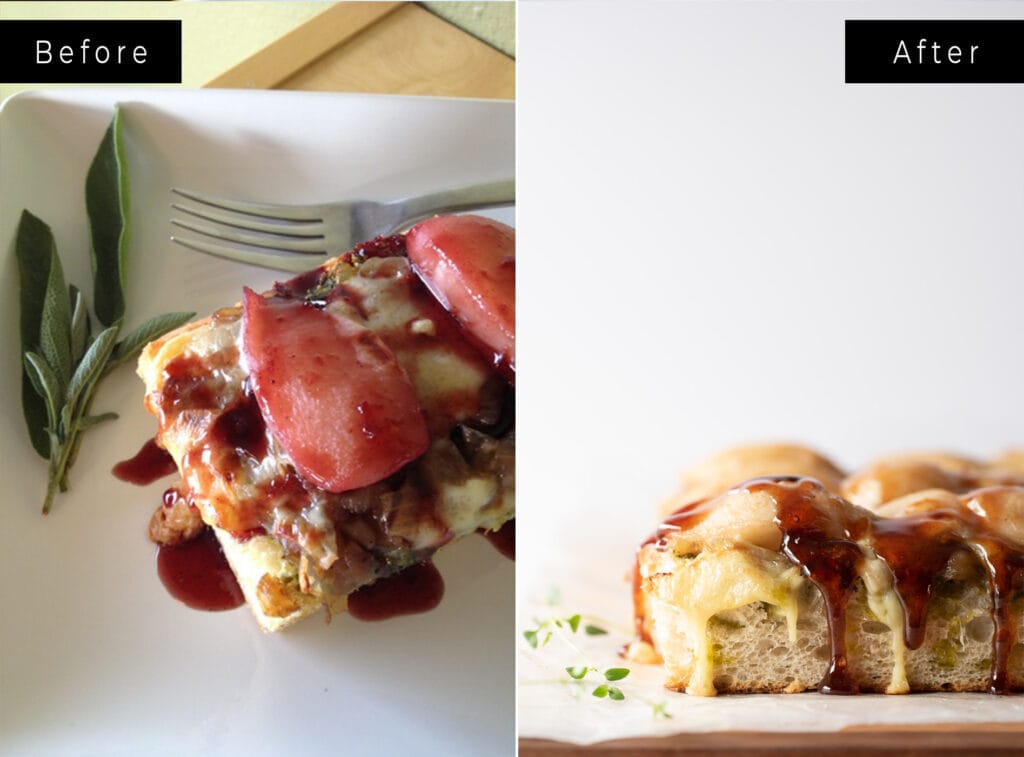
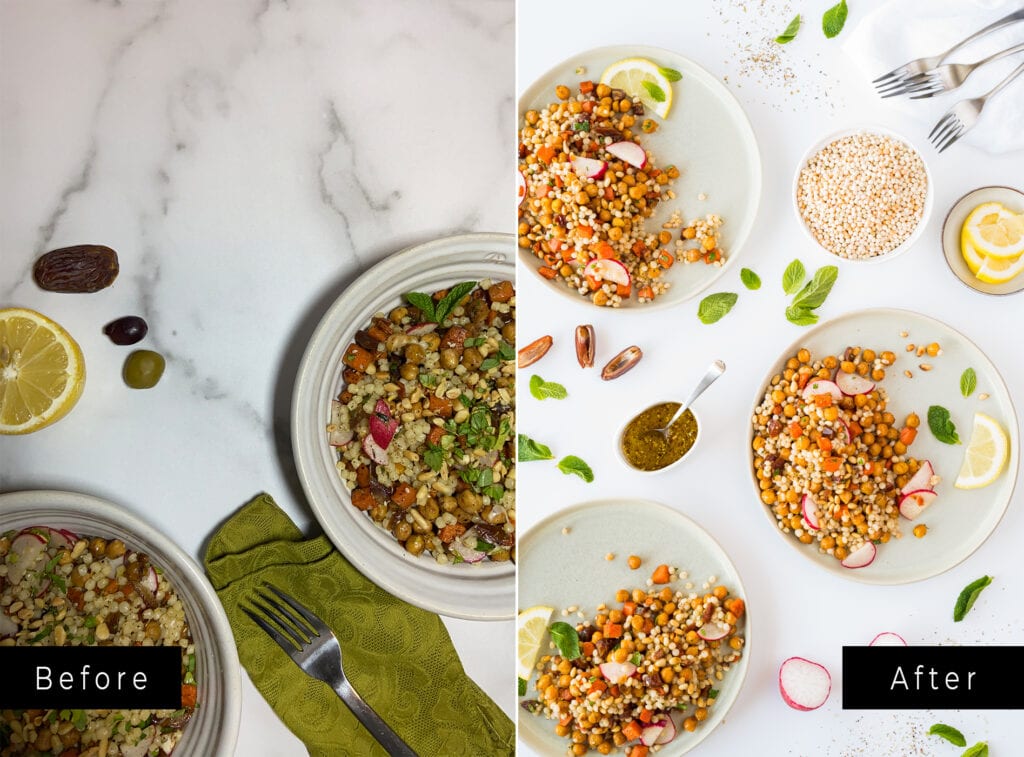
8. Reshoot and replace post pictures
This step in the process is so fraught with emotion, personal growth, and unimaginable frustration that it could be its own post. And one day it will be.
I was one of those people: happy enough with pics from my iPhone that it’s all I ever used for the blog. The phone was always with me, at home or at restaurants, and the pics were good enough. Or so I thought. It definitely served me well for nearly a decade.
The old design of my site kind of kept old posts and their pictures hidden, falling deeper into the recesses of the blog with each new post, never to be seen again. But the new design brought everything out in plain sight, including the horrific Coconut Mango Barley Breakfast pics I took in 2012. And I realized with a huge sigh it was time to up my game.
I signed up for not one but two food photography courses (Beyond Baking Bootcamp and Foodtography School), started watching videos by The Bite Shot, joined some food photography Facebook groups, and started learning the art and science of shutter speed, f-stop, and ISO. Then, in a moment of weakness, I decided to try to learn a DSLR…a “real” camera.
It didn’t go well. I made the switch, started practicing, and tried my best to make my brain understand the concepts of noise and depth of field. There seemed to be no particular formula that I could memorize and that made my perfectionistic tendencies get all grumpy.
After a particularly histrionic meltdown upon discovering that not all 50 mm lenses have the same f-stop capacity, and therefore, the ability to beautifully blur the background, I considered giving up entirely.
See, here’s what happened. I knew without a doubt that a common starting lens for the newbie food photographer is 50 millimeter (mm) so that felt like a safe and concrete place to start. But I tried using it and couldn’t get the look I wanted. Not enough blur. What am I doing wrong? Isn’t a 50 a 50?
Turns out there’s another number printed on the side of the damn lens that matters. There’s the mm focal length number (i.e., 50 mm) AND there’s the f-stop number. I was using a 50 mm f/3.5 lens. When I found out they make 50 mm f/1.8 AND 50 mm f/2.4, for example, and a million other variations, I lost my shit.
It was a steep, bumpy, mountain switchback of a learning curve and it felt like I was riding up it on a toddler’s trike with a missing wheel, but I eventually got over the hump. And then I realized I had ignited an interest in serious food photography and I will be forever grateful I inadvertently pushed myself into this new enjoyable hobby.
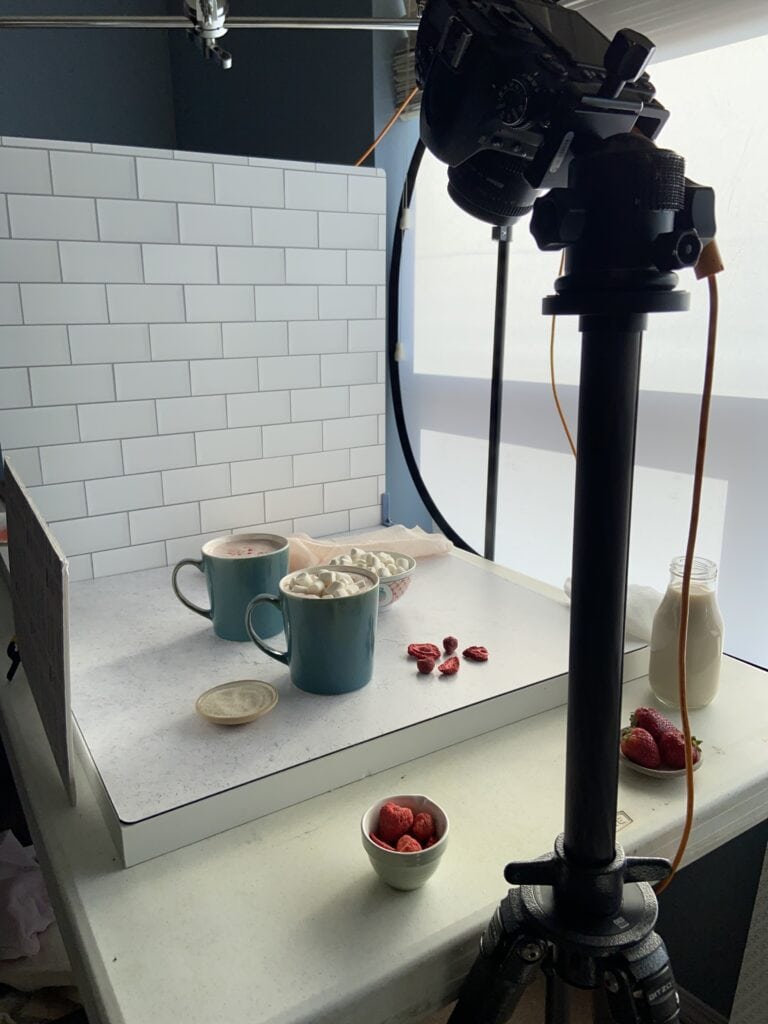
Since then, I have learned to shoot tethered, gotten sort of comfortable with editing in LightRoom, developed a healthy obsession for backdrops and props, and made and reshot 25+ recipes for the blog.
9. Fix broken links
Oh yah. Broken links are frustrating as a user of blogs and websites myself. I know this. Why did it never occur to me to check my own &#*$@ links? Well, wait as long as I did and you’ll have quite a little project in front of you. I used Broken Link Checker and found 242 of them. It took hours upon hours to fix them all. I’d sit down after dinner and make myself do 25 at a time. Then I repeated that 10 times over a couple of weeks. Ugh. Drudgery.
The most common causes of my broken links?
- Restaurants mentioned in my restaurant review posts that had since closed
- Food products by little start-up companies I had reviewed that had ultimately gone out of business
- Food products by big well-known companies I had reviewed that had changed the layout of their product websites and resultant web addresses
- Products, websites, services, etc. that had changed their name
Now I have a monthly reminder set so I’ll stay ahead of the curve and keep broken links from piling up again. Fingers crossed.
10. Change all featured images to match new design
Turns out my old blog theme/design displayed my featured images just fine. My new theme did not. Featured images are the single image you choose to be the “face” of the post. After the site design changed, about 90% of my featured images were showing as either distorted or pixelated. Every single one needed to be changed. That’s right, 221 of them.
Here’s my process. I’m positive it’s ridiculous and that anyone who knows anything about WordPress or photo editing will laugh out loud when they read this. But it worked for me and I was grateful.
- Go find the original featured image on my hard drive. This proved to be harder than it sounds. I gave no thought to proper file storage, naming, or organization for the previous 96 months. So you can imagine what a scattered mess I was dealing with.
- Open the photo in Paint and resize to the proper dimensions. Save the photo as the new size.
- When necessary, like when I’d originally used a vertical photo which now was going to display horizontally on the site, open the newly resized pic in Paint 3D and crop it. Save the newly edited photo.
- Open WordPress, upload new photo, replace the featured image for the post.
It took me weeks. Weeks! And it ended up being one of the most satisfying projects I completed throughout this overhaul because it provided instant satisfaction. The blog looked terrible with the wonky pics and I was able to fix them one at a time and it just got prettier and prettier.
11. Refresh recipes and redo nutrition analysis
For the 25+ recipes I made and reshot, it was a good opportunity to freshen up the instructions to be sure they were clear and revisit the nutrition analysis to make sure it was spot on. This was fun for me.
12. Have a professional do a plug-in audit
I happen to have the very most best hosting company in all the land: Agathon. And during this blog update process, I was reminded that they offer bits of help here and there for clueless blog owners at no additional charge. So I asked for a plugin audit and they obliged.
Plug-ins are tools you add to your WordPress blog on the back-end to do important tasks and customize the look and function of the site. Examples would be like having “share to Pinterest” buttons when you hover over a photo, a spam-catching tool to minimize spammy comments and emails, or a plug-in to display your recipes in beautiful, easily printable recipe cards.
With Agathon’s advice, I have since removed several unused or outdated plug-ins and this has simplified my life and supposedly improved site speed.
13. Stop using Feedburner
I was using Google’s Feedburner to share my new posts with email subscribers and feed subscribers. Pretty much everyone in the know had moved away from it years ago. But it was working for me and I had the “if it ain’t broke don’t fix it” mentality.
But I took a Sticky Blogging course in the middle of this blog revising craziness and followed the suggestion of the instructor to switch to a real, contemporary email marketing service. It was another plunge into terminology and technology I don’t understand, which was hard, but somehow I successfully moved my subscriber list to MailerLite. After a few glitches at the start, it’s now all set up and working smoothly in the background without me having to worry too much about it.
All of the steps above took about 8 months, and much of it, like reshooting pictures, is ongoing. I am incredibly happy with the look and feel of the new Veg Girl RD site, and grateful I undertook the project in the first place. It’s probably better I didn’t know what was ahead of me, because I might have gotten discouraged. But taking it in small, digestible chunks made it workable, and I’ve learned so very much in the process.
So, what’s next? What’s still on the list? 34 things to be exact, including getting a photo optimizing plug-in, finding someone for ongoing tech help, learning to use keyword tools, refreshing old posts with current information and new pics, and taking an SEO class, not to mention actively worrying about the looming changes Google is rolling out regarding core web vitals. But, such is the life of a blogger. There is always something new on the horizon to learn.
And I think that might be the point. I got a lovely new site through this adventure but I also gained a little perspective. I knew I was comfortable with the food part, like nutrition and cooking. So I just kept repeating that. Do what you know, ya know? But technology and web development and photography and WordPress are not in my wheelhouse. They are so far outside my comfort zone I completely ignored them whenever possible, intentionally, for 8 years, because of fear and not wanting to mess up or feel dumb or be uncomfortable.
What I’ve learned through this rough but ultimately rewarding website revamp is that I’m capable of more than I thought I was. If I’d stuck with the beliefs about myself and my limitations, I’d never have tried food styling, food photography, or photo editing. And now I successfully do them every week, like it’s normal!
So my very gentle suggestion to you is to try the thing you think you can’t do. And remember, since it’s kinda scary, you don’t have to go it alone. You can rely on other people for help, who have the knowledge and expertise you don’t. (Shout out to content sharers on YouTube, Instagram, etc.) It may be a rough ride through the middle, but when you’re on the other side there is the possibility of feeling confident, skilled, proud, glorious, and grateful.
This is not a sponsored post. I’m not an affiliate for any of the companies, etc. listed above. I just figured if someone else was on the starting end of a similar project, providing the links might make things simpler for them.

4 thoughts on “13 Steps To Update Your Very Very Old Food Blog”
I enjoyed reading these practical tips for refreshing an old food blog. Updated photos and personal stories can make older posts feel fresh and engaging. Thanks for sharing these ideas I look forward to trying some of them
Thank you!
A heartfelt thank you for your amazing share! Your unique perspectives and detailed explanations have enlightened me a great deal. This is such a precious experience, and I’m really grateful for your generous contribution to all of us.
Updating old post photos really does make such a difference, especially for food blogs where the visuals are half the experience. I also liked the point about adding more personal stories to older posts, because that can make them feel a lot less dated and more fun to revisit.
donking